But Wait...There's More...
Well, in fact, the list is probably infinite as there will always be new themes, styles and fashions that can be used to inspire design. However, let's just look at some of the more common themes related to garden design?
If you're craving for a retreat in the country that you can escape to at weekends, then why not consider creating a country garden where you currently live? Country or "cottage style" gardens have a more relaxed and informal feel to them and convey a more romantic image (possibly not a good look for rugged bachelor types but it's up to you!). 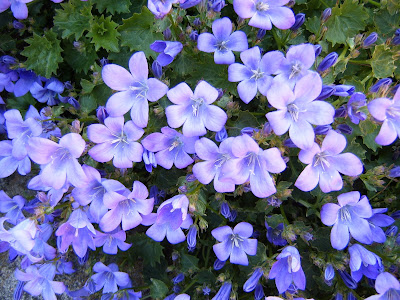 To achieve a cottage style look, you will need to focus primarily on the planting, opting for softer, muted colours that are fragranced. Note: They don't all need to smell or you'll start to feel very nauseous very quickly!
 To achieve a cottage style look, you will need to focus primarily on the planting, opting for softer, muted colours that are fragranced. Note: They don't all need to smell or you'll start to feel very nauseous very quickly!
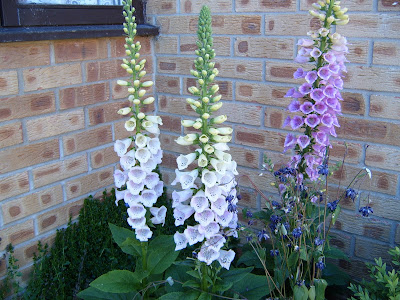
 The beauty with a cottage style design is that you don't have to worry too much about plant placement - nature will help you out here. Plants are usually placed randomly in a dotted arrangement and are encouraged to self-seed freely. Good plants to use are campanulas (picture above) digitalis (foxgloves -pictured below), Hollyhocks (Alcea) and rambling roses.
 Sprinkling packets of wildflower or specific "cottage flower" seeds will help you achieve the look quite easily but you will restrict your control on the overall planting design. You can allow plants to "pop" up anywhere, and often it is preferable to have plants growing in between cracks in walls and paths. Take care that the garden has interest during the winter months though as most plants that suit this theme tend to be Spring/Summer flowering. Country or "Cottage Style" gardens are also harder to maintain, despite the helping hand that nature lends. If left unchecked, plants could self-seed in far too many places and take over. Don't be afraid to remove plants that are unwelcome - you could always take them to a local plant sale and make money from them!
If it's the sea you dream of (or if you already live by the sea) then maybe a coastal garden is the way forward for you. Coastal gardens have very specific needs due to their harsh environment - strong sea breezes carrying sand can have a very damaging effect on plants. Opt for plants that have adapted themselves to tolerate the salty sea air, winds and sand blasting. On the plus side of living in a coastal region, there is rarely a frost and so, given the right wind protection, you can grow tender plants. Take a walk around coastal regions and, without snooping, take note of the plants that seem to be thriving in peoples gardens. These will help you to decide which plants you could use. Some suggested plants are Sea Buckthorn (Hippophae rhamnoides), Escallonia (Escallonia 'Apple Blossom'), Red Hot Poker (Kniphofia 'Atlanta'), Oriental Poppy (Papaver orientale). Visit garden centres and nurseries that are near coasts to see what they advise.
Don't just consider the plants for coastal gardens. Think to about the hard landscaping materials you could use. Crushed shells and pebbles spring to mind (please don't take anything from the beaches though as that is illegal!). Visit old boat yards and see if they have any old bits of wood, rope or chain that you could have and incorporate into your design.
The next theme that links nicely to coastal themes is water.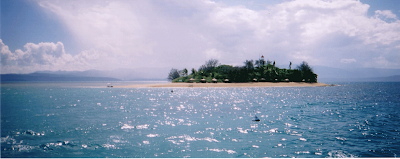 Most people want to include water in one way or another to their garden, and as I said yesterday, it is an excellent way to encourage wildlife to your garden. Why not take it one stage further though, and create the whole garden design based on water? You could use water by having separate water features throughout the garden, or by having it link different elements of your garden together. I'll look at different water types of water features at a later time but take time to think "outside the box" when considering how to use water. Try coming up with some novel and innovative ways to incorporate it into your design.
Most people want to include water in one way or another to their garden, and as I said yesterday, it is an excellent way to encourage wildlife to your garden. Why not take it one stage further though, and create the whole garden design based on water? You could use water by having separate water features throughout the garden, or by having it link different elements of your garden together. I'll look at different water types of water features at a later time but take time to think "outside the box" when considering how to use water. Try coming up with some novel and innovative ways to incorporate it into your design.As the climate changes, Britain is experiencing milder winters and wetter Summers. As a result of this, we are now able to grow a wider selection of plants and can quite successfully grow more sub-tropical plants in our gardens. It is possible to create and exotic, jungle feel to sheltered areas in gardens by using large-scale plants with dramatic foliage. There are now many specialist nurseries that sell sub-tropical plants. however. just by visiting your local "normal" garden centre, you'll find a huge range there too. The success of a sub-tropical garden is largely contributed to by the combination that you create with different textures and structural plant forms. Being predominantly green, you cannot rely too much on showy flower displays. 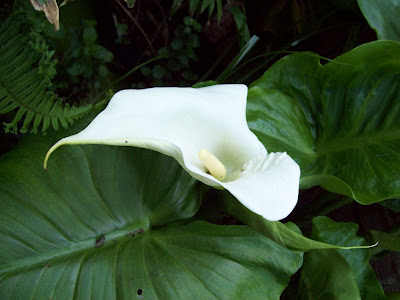 I have a stunning Zantedeschia in my garden that provides flowers to my otherwise evrgreen display (see picture). Combining the large leaves (often 2metres plus in length) of Musa basjoo (Banana) with the fine delicate leaves of Dicksonia atlantica (Australian Tree Fern) and the sleek black stems of Phyllostachys nigra (Black Stemmed Bamboo) creates an instant 'jungle' atmosphere.
  I love the look that I get with my Gunnera (see picture), although planting it under my washing line wasn't one of my better ideas, as each leaf is over 1 metre wide! Materials such as bamboo, rocks, gravel and water contribute to the style well.
Tropical planting works well in a city environment where it can benefit from the warmth and suits a contemporary design. It also works well in a colonial styled garden that incorporates "outdoor living" as its main function.
 I have a stunning Zantedeschia in my garden that provides flowers to my otherwise evrgreen display (see picture). Combining the large leaves (often 2metres plus in length) of Musa basjoo (Banana) with the fine delicate leaves of Dicksonia atlantica (Australian Tree Fern) and the sleek black stems of Phyllostachys nigra (Black Stemmed Bamboo) creates an instant 'jungle' atmosphere.
  I love the look that I get with my Gunnera (see picture), although planting it under my washing line wasn't one of my better ideas, as each leaf is over 1 metre wide! Materials such as bamboo, rocks, gravel and water contribute to the style well.
Tropical planting works well in a city environment where it can benefit from the warmth and suits a contemporary design. It also works well in a colonial styled garden that incorporates "outdoor living" as its main function.
Colonial gardens are becoming increasingly popular as we strive to create lifestyles that are more focused on enjoyment and entertainment rather than work, work,work! The colonial style adapts the Australian outback or new England way of life and adds accessories such as hammocks, hot-tubs, decking and more unusual garden furniture to the mix. Predominantly built with timber the colonial style can feel quite formal. That is where tropical planting can come in useful, by softening the look and making the garden feel more relaxed. For a more realistic colonial feel, opt for subdued colour tones of whites,greys and bleached out neutral tones if you want a New England feel. Or, to get the Australian look (I feel I'm on a make up advert now!) opt for richer hues of orange-browns with cream and dark green.
A style that was quite popular during recent years is oriental; Chinese and Japanese gardens. The key to a successful oriental garden is to remember the phrase "Less is More". All too often these gardens can fail miserably in their design as they are overdone and contain too many elements.
Scale and Balance are paramount in these gardens. Designed around the theme of nature, you are trying to recreate a landscape in miniature. They rely heavily on symbolism where rocks represent mountains, raked gravel represents the sea and small trees represent their larger counterparts. Often, stone lanterns or water spouts are positioned throughout the landscape to provide sanctuary, tranquility, and a place for meditation.
Bamboo is widely used in oriental garden both as the plant and as canes to make fences, bridges and furniture. Gravel also features heavily. Typical Japanese planting would feature mosses, ferns, bamboos, Acers, Grasses and ornamental Cherries. Again, garden centres can offer you a wide variety of plants suitable for oriental themed gardens. I'll look at oriental gardens again another time and focus on how to create a garden using Feng shui.
If space is a problem for you then you may prefer to consider a container garden. This is not as dull as you might imagine as almost anything can grow in a container so long as it is well nourished and cared for and has enough space to grow. Choose pots that will compliment your chosen garden theme. For example; terracotta pots work well for a Mediterranean garden.
Growing plants in pots is a good way of introducing plants to your garden that normally would not tolerate the soil conditions. You are totally in control of plants growing in containers as they have to rely on you for all of their needs. It's like having a (or another) child!
Speaking of children! You may want to create a garden specifically with children in mind. If this is the case then everything you design will have to be influenced by two things - safety and fun! Consider whether you actually need water. Despite it being fun, even shallow water is potentially dangerous for small children. If you are going to provide play equipment, make sure that the surrounding surfaces are suitable (concrete is not recommended!). It is advisable to position a play area so that it will be in view of adults. Hiding it at the back of the garden may seem tempting but if you cannot watch the children playing from a window of the house or a patio then it could potentially be dangerous. Get the children to join in with the design process. They might have some fun and wacky ideas that you hadn't thought of.
Although most children won't be bothered about the plants that you use, make sure you choose non-toxic plants and try to include "touchy-feely" plants.
Remember, whichever theme, or themes, you decide to use, they must fit in with the overall feel of the house and it's surroundings.


 With your list of requirements, decide what the function of each one is and decide where it would best be positioned in your garden. Make sure that the conditions in the garden match the function of your requirement - putting a cool seating area in the sunniest part of the garden wouldn't work! Knowing how different shapes influence people's feelings and behaviour is important when creating the layout of the garden. The shape should be tailored to the function. For example, if you want an area where lots of people can relax together, then you would create a square or rectangle with almost equal sides to make them feel at ease. A narrow strip would not be conducive for people to socialise with one another.


 Posts
Posts

