Showing posts with label advice. Show all posts

Thursday, 21 August 2008

More Styles and themes to consider for your Garden Design

So, we've looked at quite a few themes that you might like to take inspiration from.

But Wait...There's More...

Well, in fact, the list is probably infinite as there will always be new themes, styles and fashions that can be used to inspire design. However, let's just look at some of the more common themes related to garden design?

If you're craving for a retreat in the country that you can escape to at weekends, then why not consider creating a country garden where you currently live? Country or "cottage style" gardens have a more relaxed and informal feel to them and convey a more romantic image (possibly not a good look for rugged bachelor types but it's up to you!). To achieve a cottage style look, you will need to focus primarily on the planting, opting for softer, muted colours that are fragranced. Note: They don't all need to smell or you'll start to feel very nauseous very quickly!
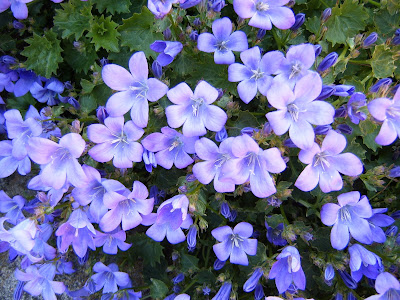
The beauty with a cottage style design is that you don't have to worry too much about plant placement - nature will help you out here. Plants are usually placed randomly in a dotted arrangement and are encouraged to self-seed freely. Good plants to use are campanulas (picture above) digitalis (foxgloves -pictured below), Hollyhocks (Alcea) and rambling roses.
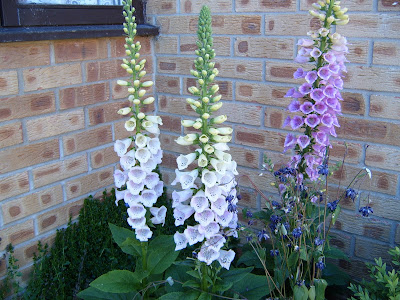
Sprinkling packets of wildflower or specific "cottage flower" seeds will help you achieve the look quite easily but you will restrict your control on the overall planting design. You can allow plants to "pop" up anywhere, and often it is preferable to have plants growing in between cracks in walls and paths. Take care that the garden has interest during the winter months though as most plants that suit this theme tend to be Spring/Summer flowering. Country or "Cottage Style" gardens are also harder to maintain, despite the helping hand that nature lends. If left unchecked, plants could self-seed in far too many places and take over. Don't be afraid to remove plants that are unwelcome - you could always take them to a local plant sale and make money from them!

If it's the sea you dream of (or if you already live by the sea) then maybe a coastal garden is the way forward for you. Coastal gardens have very specific needs due to their harsh environment - strong sea breezes carrying sand can have a very damaging effect on plants. Opt for plants that have adapted themselves to tolerate the salty sea air, winds and sand blasting. On the plus side of living in a coastal region, there is rarely a frost and so, given the right wind protection, you can grow tender plants. Take a walk around coastal regions and, without snooping, take note of the plants that seem to be thriving in peoples gardens. These will help you to decide which plants you could use. Some suggested plants are Sea Buckthorn (Hippophae rhamnoides), Escallonia (Escallonia 'Apple Blossom'), Red Hot Poker (Kniphofia 'Atlanta'), Oriental Poppy (Papaver orientale). Visit garden centres and nurseries that are near coasts to see what they advise.

Don't just consider the plants for coastal gardens. Think to about the hard landscaping materials you could use. Crushed shells and pebbles spring to mind (please don't take anything from the beaches though as that is illegal!). Visit old boat yards and see if they have any old bits of wood, rope or chain that you could have and incorporate into your design.

The next theme that links nicely to coastal themes is water. Most people want to include water in one way or another to their garden, and as I said yesterday, it is an excellent way to encourage wildlife to your garden. Why not take it one stage further though, and create the whole garden design based on water? You could use water by having separate water features throughout the garden, or by having it link different elements of your garden together. I'll look at different water types of water features at a later time but take time to think "outside the box" when considering how to use water. Try coming up with some novel and innovative ways to incorporate it into your design.

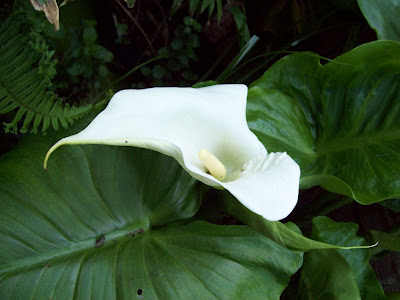
As the climate changes, Britain is experiencing milder winters and wetter Summers. As a result of this, we are now able to grow a wider selection of plants and can quite successfully grow more sub-tropical plants in our gardens. It is possible to create and exotic, jungle feel to sheltered areas in gardens by using large-scale plants with dramatic foliage. There are now many specialist nurseries that sell sub-tropical plants. however. just by visiting your local "normal" garden centre, you'll find a huge range there too. The success of a sub-tropical garden is largely contributed to by the combination that you create with different textures and structural plant forms. Being predominantly green, you cannot rely too much on showy flower displays. I have a stunning Zantedeschia in my garden that provides flowers to my otherwise evrgreen display (see picture). Combining the large leaves (often 2metres plus in length) of Musa basjoo (Banana) with the fine delicate leaves of Dicksonia atlantica (Australian Tree Fern) and the sleek black stems of Phyllostachys nigra (Black Stemmed Bamboo) creates an instant 'jungle' atmosphere. I love the look that I get with my Gunnera (see picture), although planting it under my washing line wasn't one of my better ideas, as each leaf is over 1 metre wide! Materials such as bamboo, rocks, gravel and water contribute to the style well.
Tropical planting works well in a city environment where it can benefit from the warmth and suits a contemporary design. It also works well in a colonial styled garden that incorporates "outdoor living" as its main function.

Colonial gardens are becoming increasingly popular as we strive to create lifestyles that are more focused on enjoyment and entertainment rather than work, work,work! The colonial style adapts the Australian outback or new England way of life and adds accessories such as hammocks, hot-tubs, decking and more unusual garden furniture to the mix. Predominantly built with timber the colonial style can feel quite formal. That is where tropical planting can come in useful, by softening the look and making the garden feel more relaxed. For a more realistic colonial feel, opt for subdued colour tones of whites,greys and bleached out neutral tones if you want a New England feel. Or, to get the Australian look (I feel I'm on a make up advert now!) opt for richer hues of orange-browns with cream and dark green.

A style that was quite popular during recent years is oriental; Chinese and Japanese gardens. The key to a successful oriental garden is to remember the phrase "Less is More". All too often these gardens can fail miserably in their design as they are overdone and contain too many elements.

Scale and Balance are paramount in these gardens. Designed around the theme of nature, you are trying to recreate a landscape in miniature. They rely heavily on symbolism where rocks represent mountains, raked gravel represents the sea and small trees represent their larger counterparts. Often, stone lanterns or water spouts are positioned throughout the landscape to provide sanctuary, tranquility, and a place for meditation.

Bamboo is widely used in oriental garden both as the plant and as canes to make fences, bridges and furniture. Gravel also features heavily. Typical Japanese planting would feature mosses, ferns, bamboos, Acers, Grasses and ornamental Cherries. Again, garden centres can offer you a wide variety of plants suitable for oriental themed gardens. I'll look at oriental gardens again another time and focus on how to create a garden using Feng shui.

If space is a problem for you then you may prefer to consider a container garden. This is not as dull as you might imagine as almost anything can grow in a container so long as it is well nourished and cared for and has enough space to grow. Choose pots that will compliment your chosen garden theme. For example; terracotta pots work well for a Mediterranean garden.

Growing plants in pots is a good way of introducing plants to your garden that normally would not tolerate the soil conditions. You are totally in control of plants growing in containers as they have to rely on you for all of their needs. It's like having a (or another) child!

Speaking of children! You may want to create a garden specifically with children in mind. If this is the case then everything you design will have to be influenced by two things - safety and fun! Consider whether you actually need water. Despite it being fun, even shallow water is potentially dangerous for small children. If you are going to provide play equipment, make sure that the surrounding surfaces are suitable (concrete is not recommended!). It is advisable to position a play area so that it will be in view of adults. Hiding it at the back of the garden may seem tempting but if you cannot watch the children playing from a window of the house or a patio then it could potentially be dangerous. Get the children to join in with the design process. They might have some fun and wacky ideas that you hadn't thought of.

Although most children won't be bothered about the plants that you use, make sure you choose non-toxic plants and try to include "touchy-feely" plants.

Remember, whichever theme, or themes, you decide to use, they must fit in with the overall feel of the house and it's surroundings.

Wednesday, 20 August 2008

More Garden Design Themes and Styles Ideas

Fancy yourself as a bit of an

aristocrat?

Why not take inspiration from early Greek and roman architecture and create yourself a classic garden?

During the 18th century is was the fashion for well educated young gentlemen to explore Europe, where they learned about the classics, soaked up the culture and returned home with ideas and artifacts. These ideas and artifacts were used in many gardens in Britain including Chiswick House.


Some of the great classical gardens in Italy still exist today and are a good source of inspiration. They are very structured and formal, with evergreen hedges of box and yew providing that structure. Statues and references to classical architecture are featured prominently within the gardens including follies, bridges, and temples. Framed views and vistas that are still used today in many gardens would have originated from the classical era.

If you have been thinking that you would prefer a formal garden in design, then perhaps you might like to take it one stage further and add some classical inspiration to the design. Balustrades, columns and arches can all be reproduced and should be of high quality if you plan to use them in your garden.

Whilst looking at historical themes for gardens, you may decide that you would like a garden that keeps to the traditional of the period your house was built in. in this case you will need to research the period to be sure that you represent the history accurately. The Royal Horticultural Society Library would be a good source of information about historical periods in gardening. Don't forget to consider the planting and materials that were used during that time as well as the styles.

You do not need to design the whole garden with a particular theme in mind. You could if you prefer, design a modern garden which is personal to you, but take inspiration from themes and styles that you like.

In more recent times (after Second World War) there has been a slow emergence of more contemporary designs for gardens. This has been more evident in Europe and North America, however, us Brits are beginning to catch up now!

Contemporary, modern designs work best if the building that it is being linked to is also contemporary and modern. It then becomes easy to form a relationship between the garden and the building by using the same materials such as steel and glass.

People now take a lot of inspiration from their house interiors and with the availability of many more colours of exterior paints it is possible to create "that extra room" outside. Designers trying to create a contemporary design tend to shy away from traditional garden statues and ornaments and are opting instead for trendy glass and metal sculptures and modern artwork.

There's no reason why you
should be the same.

If you want a statue of "Adam" in your modern garden then go for it - perhaps you can paint him a different colour or something! During the "Ground Force" days, it was popular to use decking, and just about everyone who could afford to do it, did it! Thankfully though the trend died down when Alan Titchmarsh quit the show. Now you have the option of choosing a material for your patio that isn't made of wood, and you'll not be considered unfashionable. Of course decking is still popular, so if you like it, use it.

As our climate has changed so have our modern requirements for our gardens. We now have to consider water management and using drought tolerant plants because of the unpredictability of the British summers. The types of plants that we can successfully grow in our gardens is also changing and a result people can create little tropical jungles in their own gardens.

The latest trend to hit our gardens is to "grow your own" vegetables. This is a fairly new trend that has been gradually increasing during the last couple of years, however, I believe that with the present economical climate, the need to be able to grow your own vegetables is going to rapidly increase now. Unlike during war days, when people gave over their entire gardens to grow crops, this time around we are incorporating the vegetable crops into our normal planting and combining the two types of planting. If you visit any garden shows you will notice the number of display gardens that feature growing ornamental and edible plants together.

Another big trend at the moment is encouraging wildlife into your gardens. Choosing plants that encourage bees, butterflies and other wildlife can be enjoyable for children and adult alike as they strive for a bit of "nature" in their hectic urban lives. Increased sales of bird feeders in recent years have seen an increase in birds visiting gardens. I tried this for the first time earlier this year and whilst I did get an increase in bird life, I also gained a squirrel that scurries along from nearby trees and helps himself (or maybe herself) to my peanuts.

Although some people may find having a squirrel a nuisance, I quite like my little visitor - he's (she's) good fun to watch!

Some people are opting to allow a section of their garden to grow "wild" including nettles and wildflowers to encourage wildlife. This can look good in the right setting but care will need to be given to it to ensure that it doesn't grow out of control and take over the rest of the garden.

Another easy way to attract wildlife is to add water to your garden. You don't need to have a huge pond with a waterfall, any water will have the desired effect. I added a half cask barrel and filled it with water. I put in a few plants and now every summer I have frogs hopping around. It's nice but they make me jump every time they move! If you're wanting to keep fish then you would need to install an adequate pool for them to ensure their health. Talk to your local supplier to gain advice from them before you make any decisions.

When considering themes and styles for your garden look everywhere for inspiration. Yes, study the countryside and other gardens, but also look elsewhere. Reading interior design magazines or going to places that have nothing to do with gardens could lead you to your big idea.

Thursday, 14 August 2008

Ten Spring Flowering Bulbs to tempt you with

Have you been to your local garden centre recently?
If you have you'll have noticed that the seasons are changing and that in the small gap between selling summer bedding plants and those dreaded Christmas decorations, all the garden centres are busily stocking their shelves with autumn plants.

Whilst ripping out your geraniums in favour of winter flowering pansies and cyclamen may be a little bit early still, now is an excellent time to think forward to Spring! I know that's a slight contradiction but hear me out, okay?

When I worked in garden centres, I always got really frustrated during Spring. People would do nothing in their gardens for the winter months (and quite rightly to - it's blimin' cold out there) and then once the excitement -or trauma- of Christmas is over, they'd traipse in to their local garden centre and ask for daffodils and tulips. And what did I say to them?
"YOU'RE TOO LATE!!!"

The bulbs that will grow into lovely Spring flowers are on sale NOW!

If you're thinking that in the depths of Winter, when not much else is growing you'd like a bit of colour to cheer you up then consider buying yourselves some bulbs now. Dig yourself a hole (depth dependant on bulb type) chuck in your bulbs, re-cover and forget about them. Then in February, March or April you'll be pleasantly surprised by a lovely display of cheerful flowers. What could be better?

There are literally hundreds of bulbs to choose from but here are a few to get you tempted:

Narcissus 'Cheerfulness'

An attractive, early flowering daffodil with white outer petals that surround clusters of smaller petals in the centre. The blooms are long lasting and have a strong fragrance. They are also good for cutting. For a bold display, plant the bulbs in large groups in well drained, fertile soil.

Planting Depth: One and a half times the bulb depth below the soil.
Plant Height & Width: 40cm (16in) x 15cm (6in)

Tulipa 'Red Riding Hood'
The bright red flowers of this striking tulip have black marks at the base of the petals, and its lance-shaped leaves are strongly marked with purple stripes. It is one of the earlier flowering tulips of the species. Plant bulbs in a sunny situation in well-drained, fertile soil, or a rock garden where they can be left for years. Alternatively, plant them in containers and replant the bulbs in the garden after flowering. For a bold display, plant with a yellow tulip, such as 'Yokahama'

Plant Height x Spread: 20cm (8in) x 15cm (6in)

Hyacinthus orientalis 'Blue Jacket'
This is one of the best blue flowering Hyacinths, with wonderfully fragrant, navy blue blooms. It can become quite an overpowering fragrance if planted in too plentiful a group. The petals have a waxy texture and purple veins. Plant it in deep, well-drained, fertile soil in sun or partial shade. Hyacinths are perfect for creating early colourful spring displays and are useful in container or window box displays. Grow them either outside, or forced in bowls of bulb fibre indoors. Note: if you intend to have your hyacinths flowering in time for Christmas, you will need to buy 'prepared' bulbs and restrict their levels of light each day.
Plant Height x Spread: 30cm (12in) x 8cm (3in)

Iris 'Katharine Hodgkin'
This vigorous dwarf iris flowers from late winter. It's upper petals are covered with fine, deep blue veins, while the broad lower petals have a yellow centre and are heavily marked with blue lines and speckles. Plant bulbs on a sunny bank or other well drained situation, making sure the bulbs are kept on the dry side during the summer. It enjoys neutral or slightly alkaline soil.

Plant Height x Spread: 12cm (5in) x 7cm (3in)

Scilla siberica 'Spring Beauty'
This bulbous perennial has small spikes of bell shaped, violet tinted, deep blue flowers arranged on one side of the stem. It is ideal for rock gardens or mixed herbaceous borders beneath deciduous shrubs or trees, where it will give you an early spring display of colour. It prefers sandy, well drained, fertile soil in slight shade or full sun. If clumps become too large, divide after flowering during the summer.

Plant Height x Spread: 20cm (8in) x 5cm (2in)

Crocus chrysanthus 'E A Bowles'
This dainty crocus has deep lemon-yellow, goblet shaped flowers, with purple feathering on the outer petals. The leaves are dark green with a white stripe. Plant in groups in well drained soil at the front of a sunny border for an early splash of colour, or grow in raised beds and containers.
Plant Height x Spread: 7cm (3in) x 5cm (2in)

Narcissus 'February Gold'
One of the most common and widely grown daffodil, 'February Gold' is extremely vigorous and in early spring produces nodding, large golden-yellow flowers with slightly swept back petals. The flowers are set off by mid green, strap-like leaves. It is suitable for planting in borders or for naturalising in grass. Plant to one and a half times their depth in sunny sites, ensuring it is well drained and reasonably fertile soil.

Plant Height x Spread:30cm (12in) x 8cm (3in)

Convallaria majalis
Lily-of-the-valley is a delightful late spring-flowering plant with arching stems of white, sweetly scented, bell-shaped flowers that appear between the dark green leaves. It makes an ideal ground cover plant for shady, damp situations and spreads very quickly by means of creeping roots. 'Albostriata' has gold-striped leaves, and 'Fortin's Giant' is slightly taller, growing to 30cm (12in). Although you can buy as bulbs, you will have a greater success rate if you buy Convallaria 'in the green' (already growing with bare roots).

Plant Height x Spread: 23cm (9in) x 30cm (12in)

Erythronium dens-canis
The Dog's-tooth violet has distinctive purple, pink or white pendant flowers with reflexed petals.The decorative oval-shaped, green leaves have pinkish-brown mottling on the upper surface. Dog's tooth violets can be planted in woodland or grass, and grow best in well-drained, fertile soil in partial shade. To propagate, lift and divide the clumps of bulbs after flowering and replant immediately in fertile soil.

Plant Height x Spread: 15cm (6in) x 10cm (4in)

Fritillaria meleagris
In late spring, the snake's head fritillary produces pendant, bell-shaped, purple or white flowers, with a distinctive checkerboard pattern on the petals. It grows well when naturalised in grass, and will often self seed. Take care when mowing, as young seedlings look very much like grasses. it should be planted in a moist, well-drained soil, and prefers slightly alkaline conditions. If the bulbs become too congested, mark the position and they can be lifted in the autumn and replanted elsewhere.

Plant Height x Spread: 30cm (12in) x 8cm (3in)

Whetted your appetite? Why not take a trip to your garden centre and give your self something to look forward to next year? Not only will you have a fabulous garden display in spring but the garden centre staff won't have to tell you you're too late when you ask them for daffodil bulbs in February!

Friday, 8 August 2008

Hey it's Friday!! It must be time to learn about a new plant!

Okay! The end of another week!

What plant category do you want to look at today?

We've looked at Rhus typhina and Berberis thunbergii 'Atropurpurea', so how about we choose an herbaceous perennial to add to them?

For those of you that get confused about annuals, perennials, herbaceous, etc - basically an annual only grows for ONE year. It may set seed and you might get NEW plants the following year but that original plant will only live for ONE year. A perennial, or Herbaceous perennial, will live for MANY years. The growth of the plants will die down during winter an the roots will become dormant during that time ( think of them like hedgehogs hibernating over winter). Once the weather warms up a bit in the Spring, they will begin to grow again. As our winters are becoming milder though, many herbaceous perennials are forgetting to "hibernate" and as a result can look a bit untidy in the spring. If you have plants like this you can cut off the dead leaves and flower heads. Don't worry if this is a majority of the plant it will re-grow and look lovely because of its hair cut!

Back to Plant File Friday!

Today's herbaceous perennial is:

Sedum spectabile 'Autumn Joy'

Deciduous or Evergreen: N/A

Design Function: Ground Cover, Attractive to wildlife

Form and Shape: Mound

Texture of Leaves: Fleshy, serrated-edged and glossy

Colour of Foliage: Pale blue-green

Colour of Bark: N/A

Colour of Flowers: Flat flower heads of deep red-brown

Main season of Interest: Autumn

Horticultural Information:

Country of Origin: Europe, N Africa, W & N Asia

Soil Type preferred: Well-drained but will grow in any type

Aspect preferred: Sunny

Height and Spread at 5 years: N/A

Height and Spread at maturity: 45-60cm x spread as permitted

Common Problems: Prone to mildew in prolonged wet periods

National Collection: Mr & Mrs R Stephenson, Northumberland

My personal Opinion of
Sedum spectabile 'Autumn Joy'

This perennial is great for attracting wildlife to your garden, especially bees. It flowers late in summer and Autumn and so gives you a display when not much else is doing anything. The colour of the flowers perfectly complement a wide range of other plants and so makes an excellent companion plant. It does suffer though if an autumn is particularly wet - suffering from mildew and possibly the stems will be flattened to the floor with the weight of the wet flower heads. That said though, its worth the risk of planting as the advantages far out way the disadvantages for this plant.

Monday, 4 August 2008

How to draw up your Site Survey and Analysis Plan.

Welcome back!

How did you get on with that jigsaw? Or did you take one look at it and panic like I did? Either way, I hope you had a good weekend.

Today, we're going to look at all of the measured and non-measured information that you've got from your garden, and we're going to draw it up in to our Survey and Site analysis Plan. Finally!

Don't panic! It's not that bad! Just a little time consuming, depending on how good you are a technical drawing.

The first thing you need to do is to decide what size scale you need to use. As mentioned before this will be based largely on how large your garden is. If your garden is huge - you lucky things- then you will probably have to use a scale of 1:200, but this is best avoided as you will not be able to add much detail and will be quite hard to draw.

For those of us with normal sized gardens, and those that are the size of a postage stamp, I'd recommend using a scale of 1:100 or 1:50. Whichever scale you chose though, you will need to measure the longest widths and lengths onto your paper to make sure that they fit. Not only do your longest measurements need to fit, but you will need to have ample room around your drawing to be able to make comments. If you try to crowd it into small gaps it will look muddled and confusing, and you probably won't have a clue what you were talking about when you come to use your plan. You will also need to decide the best angle for your piece of paper - horizontal (landscape) or vertical (portrait) - to allow for your drawing. It is usually best to try placing your building at the bottom of the page and working up from that.

Remember to mark on your plan what scale you are using and which way north faces.

For this to work you will need:

Tracing paper
Masking Tape
Smooth 'underlay' paper
Scale ruler
Retractable pencil (0.5mm lead)
T-Square
Adjustable set square
Beam Compass
Drawing Board (optional)

Using the masking tape, secure your underlay paper to the table top or the drawing board. You could use graph paper for this which will give you some sense of scale but it is worth remembering that very few, if any, of your measurements will exactly fit this. Next secure your chosen size of tracing paper over the underlay paper making sure that you can see the lines of the graph paper through it. You must ensure that any vertical or horizontal lines that or are draw on the plan are true and square. Otherwise you will end up with many errors and the plan will be inaccurate and meaningless.

The first line to draw will be your baseline of the house. Draw it in exactly the same direction that you took the original measurement. Next you will need to plot your boundary corners and draw in the lines to your boundary.

To plot your corners, refer to your triangulation notes. Use your scale rule to adjust your beam compass to correspond with your first measurement from, the fixed point at the house to the boundary corner. Now place the 'spiked' end of the beam compass at the location of the fixed point of the house on the drawing, and, using your best guesstimate, hold the pencil end of the compass in the area you believe the boundary corner to be. Then, when you're fairly happy with the position, scribe an arc in that area. Repeat this process with your second triangulation measurement (probably from the other fixed point on your baseline). Where the two arcs meet - that is the actual position of your boundary corner.

Easy, huh?

Continue this process for each point that you have triangulated in the survey. Once you have your boundary plotted, you can then continue to fill in the rest of the drawing. Plot everything that you measured on-site and write information around the edges to complete the analysis. (See Diagram Below)
For features that you measured using the 'offset' method, you will need to plot them onto your drawing in exactly the same method - plot the baseline you used and measure from each point along it, just as you did in the garden.


If measurements are not adding up now that you are putting them onto paper, you probably made an error in the recording stage and will need to re-measure. Don't beat yourself up over it. Simply pop back out to the garden and re-measure - problem solved!

Take as much care with drawing as you did with the measuring. Your plan needs to be as accurate as humanly possible.

And that's all there is to it! It's fairly simple - it's just really time consuming!

Taking a separate piece of paper, you will need to draw up elevation drawings to accompany your Site Survey Plan. Work through your measurements in the same order that you took them, starting from the baseline. Add written information to relate to features along the house front (or whatever the subject of the elevation is) onto your new elevation plan. I'll go into elevation drawings at a later date so don't worry if you can't get the hang of it yet.

The important thing at the end of this stage is that you know exactly what exists in your garden and have an accurate drawing, or drawings, recording that information.

If you're satisfied that you have done all of that -Well Done!. You are now on your way to becoming a garden designer!

The next thing we'll look at, is trying to decide what you might like in your newly-designed garden.

Friday, 1 August 2008

Top Ten Favourite Shrubs - Berberis thunbergii 'Atropurpurea'

It's Plant File Friday day again!!!

So last week we looked at the profile of a small tree - Rhus typhina. Trees are great in any garden as they add height and structure and help to form the backbone of a garden. You can also plant them alone and make a feature of them.

Today, lets look at a shrub that you can plant with the Rhus typhina and start to form that backbone!

Latin name:

Berberis thunbergii 'Atropurpurea'

Deciduous or Evergreen: Evergreen

Design Function: Structural, hedging

Form and Shape of Shrub: Round

Texture of Leaves: Smooth

Colour of Foliage: Maroon

Colour of Bark: Dark Reddish-Brown with thorns

Colour of Flowers: Yellow followed by Deep Purple Berries

Main Season of Interest: All year for foliage / Spring for flowers and berries

Horticultural Information

Country of Origin: Japan, China

Soil Type preferred: Acid or Neutral

Aspect preferred: Suits any aspect

Height and Spread at 5 years: 1.8m x 1.8m

Height and Spread at maturity: 1.8m x 1.8m

Common Problems: None Known at present

Other notable Cultivars of Species: Berberis thunbergii 'aurea' (foliage), Berberis darwinii (flowers/fruit)

National Collection: Mr R.J. Gregory, Nottinghamshire

My personal opinion of Berberis thunbergii 'Atropurpurea'

I love this shrub! I'd have to say it's in my top ten all time favourite shrubs. Hence why it's the first one I've listed here! This shrub is so versatile and can be used in the back of borders to add backbone and structure or as a hedge. As it's prickly it works well as a security boundary. Anyone trying to scramble there way through a hedge made of Berberis thunbergii is seriously going to feel it! Being evergreen the leaves stay all year round and even in the thick of winter you can have a stunning display of bright red leaves. Not only is it attractive to look at, but it doesn't need much care. Apart from an annual prune to keep it in shape, and regular watering/ feeding when it is young, you can leave it to pretty much get on with it. It's fab! The flowers are quite an acid yellow which are quite welcoming in Spring and are followed by masses of berries which the birds absolutely love. I use this shrub a lot in my planting plans.


Thursday, 31 July 2008

How do you feel? The final part of site analysis!

Have you recovered from our mammoth session yesterday? We're nearly done with the site analysis but there's still some things to consider. So, if you're ready to crack on then let's get going again.

It is important in any garden to understand its climatic conditions. It will directly influence many of your design solutions, adding screening and shelter for plants and people, or helping decide which plants to use.

The climate is directly influenced by the location of the site. A garden close to the sea would create a fairly mild climate (depending on the orientation of the coastline) as you rarely get frosts or snow close to the sea. If you were situated very close to the sea, it is more than likely that you would suffer from strong winds and salt spray, which would affect the climatic condition of your garden. Built up areas and towns can offer a warmer climate for gardens than rural situations, as the neighbouring buildings create shelter. However, you need to be aware of wind funnels that sweep between buildings and can cause quite a lot of damage to any plants in their path. When you're searching your garden for clues to what your climatic condition may be, make sure you check for signs of wind damage, which will conclude that you have a wind problem in your garden - unless it's blowing a gale, in which case, you'll be able to tell how windy your site is without studying the plants! You can recognise wind damage on plants by scorched markings on leaves, which would, in severe cases turn the leaf brown and dry up completely. Larger shrubs and trees may be growing in a different direction if they are subjected to strong winds over a long period of time. What is the typical amount of rainfall in your region and does that affect how dry your garden is? If you have a particularly dry site, you will need to consider plants that will tolerate drought better. The other extreme would be excessive rainfall, and this can have a damaging effect on plants and soil. In heavy, long lasting down pours, soil could be pounded to such an extent that it is made smooth and in this case, water has difficulty penetrating the surface. Check your soil after a heavy downpour. Dig down a little and see how far the water has soaked down. This will give you a good indication to what your drainage is like.

If your garden suffers from heavy frosts then you will need to carefully decide which plants to grow. Trying to grow a banana in the British countryside is unlikely to work! Built up areas and coastal regions rarely suffer from frost and if you have a garden located in such a place, then you can be more adventurous with your plant choice.That's if you want to be, of course!

Recognising climatic conditions is fairly simple - just remember that everything in your garden is linked - climate, soil type and environment are all contributing factors to the condition of your garden.

Okay, so now you are beginning to learn a lot about your garden. You will need to also know whether your garden has any problems with drainage. Look at existing patios, paths and steps. Are there any signs of bad drainage? You may need to run a hose over them if it's a dry day to see if there's any pooling of water. This would suggest that the fall of the patio, or steps, etc, is not at the correct level and water is unable to drain away. If areas are green with algae and slippery then you've likely got bad drainage in that area. Don't forget to check flower beds for drainage problems too. Many drainage problems could be related to poor soil conditions and can be easily rectified. Built up, raised flower beds may not have adequate drainage in their walls and this will also need to be rectified or plants will just 'sit' in water and their roots will become waterlogged and eventually die of suffocation. Lawns should also be laid at a slight angle to allow for surface run-off. If your lawn is covered in a lot of moss and creeping buttercup, then you have poor drainage. This can be improved by aerating your lawn and adding lawn sand at certain times of the year.

Whilst we are considering drainage and water, make a note of any water features that you may have in your garden. You will need to observe not just what it is - plastic pond, brick water fountain, etc - but also any types of wildlife present. Are there any fish or frogs present? If it is well positioned and maintained annually then there should be signs of life and the water should be clear. If it is not then you may need to consider a different option or position.

Consider also the views into and out of your site. How overlooked are you? Is their an eyesore outside of your garden that you'd rather not see? Is there a particular window in the house that you would like a better view from? Remember seasons will affect your views at different times of the year.

If your thinking big for your design and are planning on major excavation work, then you will need to locate any service lines or pipes that are in your garden. Chopping through a gas pipe could be dangerous and costly!

If your site is situated in a conservation area then you will need to check with local authorities what work is permitted to be carried out in your garden. Likewise if you have a particularly beautiful or rare tree in your garden it may be subject to a TPO (Tree Preservation Order) , and you will need to seek permission before you carry out any work to this tree. Make sure you're aware of any public right of ways through your property. I don't think ramblers would appreciate a brick wall suddenly appearing on their Sunday morning walk!

Whilst noting all of the plants that are currently growing in your garden you will need to make notes of which ones you'd like to keep, move, or get rid of altogether. Don't panic that you don't know any of their names. Take a good plant reference book out in the garden with you and work out what they are from that. If you are still having difficulties, take samples, making notes of what growing habits they've got. Then, take the samples to a local garden centre. They should have experts on site that will be able to identify the plants for you. Bear in mind that not all plants may be showing at the time of year that your analysing. Perennials and bulbs may be hidden below ground out of their growing seasons. Try looking at past photographs if you cannot remember exactly what you've got. If you're in a new garden, then it would probably be advisable to wait until you have experienced all seasons in your garden before making any final plans. You never know what might pop up when you least expect it!
Take a closer look at the plants whilst you identify them and check for signs of damage by pests and diseases. Again, you can use a reference book to identify any problems and then can decide what remedies need to be taken.

Finally... take time to consider how you "feel" in your garden. Although it is important to record all of the above details, it is also important to be aware of how you, and your family, fit into the space. Does it make you feel relaxed, energetic, claustrophobic? It is your garden and you need the design to fit your purpose. If you want a garden that the kids can play in but it currently has extravagant planting then you will need to consider what modifications are needed. Start to become aware of what you want your garden to do for you. This will help when we come to creating a design brief later on.

Wednesday, 30 July 2008

Magnifying glasses at the ready, it's time for the site analysis!

How did your random sketching go? Don't worry if what you had in mind didn't really happen when you tried putting it on paper. We'll go through drawing techniques at a later stage and you'll be able to convey your ideas then. Until then though keep practicing.

Right, where were we? By now we have all of our site survey measurements and some piccies to go with it. We will need to draw up this measurements on a scaled plan soon but before we do that, we need to capture, and record, any other information about the site that is potentially important and relevant to the design process. This part is known as the site analysis and includes all non-measurable information. The information you gain here can be added to your final site survey plan, or you can do a separate plan. It will depend on how much information you find and how complex the plan is in the first place.

To carry out a site analysis you will need to pretend you have never been to your garden before. There may be things that you just don't notice any more, like a train passing by or excessive traffic noise. By pretending that you've never been here, you are more likely to notice things that you have become blind to. Of course, at times it will be helpful to remember things that occur in other seasons, for example, where bulbs come up in the spring and which plants provide good autumn colour.

You will need to 'get a feel' for the garden. To do this, don't just look at the physical landscape within the boundaries, but study the garden's surroundings. Where are you? Is your garden set amongst countryside, or woodland, or more town gardens? Are there any visible structures outside of your boundaries that affect the 'feel' of your garden. It can be good or bad, you need to observe and record everything!

Take a thorough look around your garden. Are there any elements that suggest a theme or would influence the new design? Are there features or materials that you would want to keep? Take a look at your house? Is it a particular style or period? You could use this style to influence your design. If you wanted to create a garden that was true to style, then visit a library, (or a search engine!) and research what gardens were like in the year that your house was built. If you want to, visit show gardens that depict designs from that period and seek inspiration. If you have a period house and want to include some historical elements to the garden, but don't want a complete restoration, then look at what materials were used then, or methods that were used. Including small elements of the period can work just as well to creating a link to the building as a complete restoration would. Another way to create a link between the house and the garden is to use similar proportions in your garden as are on the house facade. It is subtle, but will help your garden to flow, and make you feel at ease when you are in your garden.

An important piece of information to know is the orientation of your site. Which way does it face? Use your compass to establish in which direction magnetic north faces, and note this down onto your rough survey plan. You will also need to note what conditions are like on-site. Is part of the garden shady, gloomy, damp, a sun trap, etc? What shadows are cast by certain tress or buildings throughout a day? You can do a little exercise to find this out by choosing a relatively sunny day and making a study of how the sun moves around the garden at hourly intervals. Draw yourself another rough outline plan of your garden (doesn't need to be drawn to scale), and mark down any large features that may cast shadows (sheds, trees,etc). Each hour, sketch the areas that are sunny or shadowed onto your rough plan. Remember that the sun is higher in the summer and so you will get different shadows in your garden at different times of the year. The garden will have less light in the winter than in the summer. You will need to think of every season and how each element in your garden would be affected by them. By being aware of these factors you will be able to successfully chose plants that will flourish in your garden. If you observe moss or green algae on walls and steps it would suggest that there could be a drainage problem and this will need addressing too.

As well as considering physical factors you will need to observe environmental ones. A busy nearby road can cause noise and air pollution and may be something that you wish to improve when you come to create your design. There may be a local industry that creates pollution, and whilst it will not be possible for you to do anything about this, you can develop a design that will help disguise the problems.

You will need to know what type of soil you have (and no, saying it's muddy isn't good enough!). If you are unaware of your soil type and quality then any plants you try to grow will have a greater chance of failing.

All soils consist of four parts - inorganic materials, organic matter, air and water. It is the balance of these four parts that determine the quality and fertility of your soil. When analysing your soil you will need to record the texture and the pH level (pH means the potential hydrogen content, and tells you how acidic or alkaline your soil is). The texture of most garden soils generally fit into the categories of sandy, clay, loamy, chalky or peat. We find this out by examining the different particles that make up the soil. This is much easier than it sounds and simply consists of you rubbing a moist sample of the soil in between your fingers to determine its texture. Do this in several places in your garden, as the texture may differ in different places.

To tell what the texture is, here is a short description of the characteristics of each type:

Clay - the particles are less than 0.002mm in diameter. It is a fine textured soil that feels sticky to touch. In extreme cases you can work the soil into a shape and it will stay that shape! It is heavy to work with and is slow to warm up in the spring due to its high water content. It can be very fertile. In winter it can easily become waterlogged and in summer it becomes cracked and shrinks when dry. It's not all bad news though, as its make-up does hold many essential elements that are needed for healthy plant growth.

Sand - is gritty to touch. It is light and free-draining and warms up quickly in the spring. You will be able to work a sandy soil easily but its free-draining nature means that nutrients will be washed away quickly. As it loses water and nutrients easily, it tends to become acidic quite quickly and needs to have as much organic matter added to it as you can find. This will help to retain the moisture.

Loam - steals characteristics from both clay and sand. It is moisture-retentive and fertile, but will compact easily. If you've got this soil then you are in an enviable position, as it is easy to work with and encourages healthy plant growth for a wide range of varieties.

Chalk - is pale and shallow. It is free-draining and fairly fertile but is very alkaline making your choice of plants limited. Nutrients get washed through quickly and you will have to work hard to improve it with the addition of rich organic matter and fertilisers.

Peat - is very humus rich and fertile. It is dark in colour and retains moisture well. It is a good growing medium but tends to be acidic and would benefit from the addition of loam and drainage material. You will need to focus on acid loving plants for this soil type.

Look at the diagram below. You will see that soil is made up of four layers;

Surface Layer - contains organic debris from leaves, etc.

Topsoil- where most living organisms (worms, grubs,etc) and highest levels of nutrients live. This is due to the surface layer of organic matter which releases nutrients into the soil below it. This is the best part of soil for growing plants as they will absorb the nutrients whilst searching for oxygen and water.

Subsoil - supports less life than the topsoil layer. It is usually firmer and more compacted and nutrients that have been washed through from the topsoil will settle here. You will usually find it lighter in colour than the topsoil as it supports less life. If you cannot notice much difference in colour between the topsoil and the subsoil, then it would suggest that your topsoil is deficient of organic matter.

Parent rock - supports no life and derives from rock that is local to your area.

To find out the proportion of each of these layers in your garden, it is usually sufficient to take samples of soil with a trowel and a plastic bag. Again, remembering to take samples from various places around your garden. If you need a better inspection then you can dig a soil pit. This hole will need to be large enough for you to see into it. Once you can see the colour of the soil, either by looking at the sample in the plastic bag or in the pit, you can determine what condition your soil is in. If the soil is dark brown or even black in colour then it would suggest that the soil is rich in organic matter, and if it is also well drained then it is likely to be rich in nutrients. If the soil is extremely black then it is likely that there is a drainage problem. A well-drained soil is usually brown to the depth of one metre. A soil that is completely waterlogged will sometimes turn a blue/slate kind of colour. If your soil is grey or white then it would signify that the soil is chalky or that it has had its nutrients washed out.

Now you should have a good idea of what type of soil you have and just how good its going to be at growing plants. You will also need to know it's pH level. The higher amount of Hydrogen present in the soil signifies more acidity. The lower the amount of Hydrogen present in the soil then, yes, you guessed it, the more alkaline the soil is.

The pH scale goes from 1 to 14 with acidic readings starting at 1. If you get a reading of 6.5 - 7 then you have a neutral soil. A reading of 13 indicates an extremely alkaline soil and so on. I'm sure you get the picture! Most soils in temperate regions will vary between the pH readings of 4 (acid) and 8 (alkaline). When you know your pH level of soil you will be able to choose the plants that will grow best in that soil type. Trying to grow an Azalea in a soil with a pH reading of 10 just isn't going to work!

The pH level controls the release of nutrients in the soil. The more extreme a pH level (at either end of the scale), the more plant nutrients are locked out of the soil. This will prevent the growth of certain plants. If you have a neutral reading then you are in the most fortunate position as most plant nutrients will be released and you can chose from a wider variety of plants. Although, if you were hoping to create a Japanese garden, you'll have to add ericaceous composts and feeds, else the plants just won't grow - they need acid soils.

So, you've read all of that and I haven't told you how to find your pH level reading! Easy. If you haven't already done so, go to your local garden centre and buy a pH soil testing kit. They will vary in price and sophistication but you can pick up simple ones that only cost a couple of pounds. Most of these kits give you an indication of the pH level by using a colour chart. When mixing water to the soil sample only use distilled water as this a neutral pH and won't affect your reading.

It would be advisable to take soil pH readings and texture samples from the same places on-site. You will be able to note down on your rough plan what each reading is. If you are running out of room on your plan now then you can number the positions on the plan and add a list on another page.

That's enough to be going on with for today. We'll continue to look at the site analysis tomorrow.

Tuesday, 29 July 2008

Back to work - Measuring level changes in the garden

Okay, party celebrations over. Time to get back to work!

If I remember correctly (and I do because I've just re-read it) then we were discussing your steps and how they change level.

Any level change in your garden needs recording whether it's steps or slopes. Measuring them isn't actually that bad, so there's no need to panic just yet! If the incline is particularly complicated then it may be worthwhile hiring a professional surveyor. If you're willing to give it a go though then well done you.

The key to getting this bit right (and in fact any other bit) is to work methodically and accurately. If you haven't used your assistant up to now, then it may be a good time to ask them to put down their cup of tea and come and help you. There are different methods for measuring levels, but whichever method you choose you must make a record of not only the change in level of a certain distance, but also make a record of the actual distance you are measuring. Plot the points that you are recording on to your survey plan. If you fail to do this and later cannot locate the points then it will have been a complete waste of time and you still won't know your level changes for your plan.

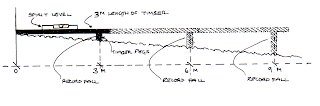
The most common method of measuring level changes is to use a straight piece of timber and a spirit level. You will also need shorter wooden pegs. Aim for your piece of timber to be 3 metres long if you have an average sized garden. Starting at the highest point, place your long piece of timber (i'm going to call it Woody from now on because it will be quicker to type) onto the ground. Support Woody with a wooden peg at the lower end. Sit your spirit level on top of Woody to make sure it's straight. Then, when you're happy that Woody is level, measure the distance from the bottom edge of Woody to the ground. This will tell you what the fall of the land is over a 3 metre period. Needless to say if you can't fit a 3 metre "Woody" equivalent into your space then use a shorter piece, allowing for this in your calculations. You can repeat this procedure over a longer length by moving Woody along each time (see diagram).

If you are unable to obtain a 3 metre piece of timber named Woody (name optional), then you can carry out the same procedure using a 3 metre length of string. This method isopen to more error though as you must remember to keep the string taut at all times.

Another method of measuring changes in ground level is by using optical measuring equipment. This equipment is really useful in much larger gardens and is usually available to buy or hire. As we are looking to save money by designing our gardens ourselves though, I won't go into detail about this method.

Whatever method you eventually opt for you will need to establish a datum point onto your survey plan. The purpose of a datum point is to allow you to have a fixed point that all subsequent measurements can be related back to. Where you decide to position your datum point is not crucial although it would be easier for you if you pick somewhere that is accessible. often the datum point is positioned close to the house or in a piece of ground that is going to remain at the same level when the design is completed.

At a risk of confusing you even more, the datum point, once you have chosen it's position will be known as your 'zero level point'. All recorded heights will then either be higher (+) or lower (-) than your datum point (zero level point).

At your chosen datum point position on the survey write "0:00". If your next level measured is, say, 70cm lower than the datum point, it would be written as "-0:70" or if the level recorded was 30cm higher than the datum point, then you would write "+0:30". Get it?

And that's all there is to it! Easy huh? You can have another cup of tea now and then we'll get the camera out!

Refreshed? Good. This next bit of the site survey is the easiest of all. This is the bit when you can be like David Bailey (or any other photographer you admire) and snap away to your hearts content.

"Why do I need to take photos when I can just look out of the window?"

Photographs provide an excellent record of the site and you can use them to create underlays for any sketches of designs (brilliant if you're not picasso!). The best way to capture the whole garden is to take a composite photograph. This involves you standing in one spot and rotating 360* taking a series of photos that overlap each other. When you have your photos you can piece them together like a jig saw. If you have a posh photo editing programme you may be able to piece together the photos on the computer, and then print out the finished composite photograph. Whichever way you chose, the proportions of the garden will get extremely distorted, and you will need to remember this when you use them as underlays for sketches.

What are you like at drawing? You may find it helpful to draw or sketch a particular scene or feature in the garden that you want to capture. By sketching it you will become more familiar with it as you're having to actually study it, and not just click a camera at it.

Once you've got your photos, have a mess around with them. Enlarge or reduce the images and make photocopies of them. Grab some tracing paper and put it on top of your photos as an overlay. Try sketching new ideas on top of them. They don't have to be masterpieces. It's just an opportunity to start experimenting.

Friday, 25 July 2008

Plant File Friday - Rhus typhina

Do you fancy a break from all of that garden measuring?

I've decided that Friday will be known as Plant File Friday! It's a naff name, I know but until I come up with a better one, it'll have to do.

The purpose of "Plant File Friday" is to build up a file of plants that you can call upon in any situation. It will hopefully help you when it comes to planting designs.

Plant File Category:
Trees for small gardens

Latin Name: Rhus typhina
Deciduous or Evergreen: Deciduous

Design Function: Focal Point, Structure

Form and Shape: Large, shrubby mound. Almost bell-like in habit. Can be trained to be more "tree-like"

Texture of Leaves: Smooth, pinnate, long

Colour of Foliage: Green (vivid reds/oranges in autumn)

Colour of Bark: Deep Brown

Colours of Flowers: Dark Maroon, 'horn-like' spikes (female only) fruit

Main Season of Interest: Late summer, Autumn


Horticultural Information:

Country of Origin: East, North America

Soil Type: Light well-drained

Aspect prefered: Sunny

Height and spread at 5 years: 3.0m x 3.0m

Height and Spread at maturity: 3-4.5m x 3-4.5m

Common Problems: Roots can be invasive

So what do you think? I'd appreciate any comments about this plant profile. Tell me what you like and what other information you would like to see included in future plant profiles.

Thursday, 24 July 2008

Knowing how to make your Measurements

Right! Back for the next step already?

We are, you'll be pleased to hear, onto the last stages of recording measurements on-site. Now that you've calculated all of the baseline details you're ready to measure the rest of the garden-hooray! First things first, you'll need to measure the boundaries. At this point it's worth pointing out that your garden, in most cases, will not be square (or rectangular). Even if you have an amazing eye for details and would swear to a court of law that yours is square (or rectangular), it's worthwhile checking these things properly, all the same. Most gardens are an irregular shape - which is really annoying at times! - and it is necessary to get these measurements absolutely correct. Am I repeating myself here? Sorry, but it really is important to measure your garden accurately.

There are a few techniques used in carrying out a site survey. Let's look at two of them in detail.

Triangulation

This technique helps to establish correct angles and is excellent for measuring boundaries. Also, if you have a random tree (or other feature) on-site that you cannot measure from the baseline, then triangulation would work well for this too.

In order to use triangulation, you will need two fixed points that feature on the baseline. In other words, you need to refer to two known measurements from your baseline. It is usually the two corners of the house, but it could be any measurements you want to use. It will be easier to do if they are some distance apart though, as they'll be less cluttered on your rough survey plan. In case I've confused you, your rough survey plan is the bit of reasonable sized paper on your clipboard that you've sketched your baseline measurements on. Once you've established your two fixed points, simply take your second 30- metre tape and measure from each fixed point to the item that needs measuring. In the first instance this will be the top boundary corner of the garden. When you put these two measurements together they will form a triangle and establish the exact position of the boundary corner (or whatever item it is that you're measuring at the time).

Recording this on your rough survey plan, you will find it less confusing at a later date to ensure that you label each fixed point (see diagram below).

In the diagram, you can see that 'point A' and 'point B' are on the baseline and the item being measured, in this case, the boundary corner, is 'point G'. Note the triangle that is created from the two measurements.

Always make sure that the two measurements are taken to the item in the exact same place. If you were to measure a tree, for example, and with one reading you went one side of the trunk, but with the next reading you went to the other side of the trunk, it could be very inaccurate - depending on how old the tree is! You would need to measure in the centre of the trunk, or, do two different triangulation measurements of the tree and later measure its circumference.

If an item that you need to measure is too far away from your baseline's fixed points, then you will need to establish new fixed points closer to the item. This is okay to do so long as you ensure the accuracy of these new fixed points. You can have as many fixed points on-site as you require. Try to keep it as simple as possible though otherwise you'll end up in a right pickle when you come to draw it up later.

Once you have established the boundary corners you can continue to measure the lengths of the boundaries and record the results onto your rough site survey. When you come to create your design, you will need to know who owns each boundary. If you decide to do something spectacular with it and your neighbour owns it, you may end up in all sorts of trouble. Don't forget to write down any information about the boundary itself in your little note pad. Include features such as, what material the boundary is made of, it's height and what condition it's in. If you're looking at a fence, then you'll need to measure each panel and so forth. You will benefit from knowing as much as possible about your garden. Get intimate with it!

You can measure all of the features along your boundary by repeating the same process that you used for the baseline. There may be other features along the boundary that you will also need to record. Flowerbeds, plants, pond or structures may all be present. If you are measuring flowerbeds, you will need to record the position of plants in the bed. This may make your rough site survey too crowded and you may find it easier to complete a seperate sketch for each flowerbed. To measure the plants you will need to start from your boundary and run your measure to the centre of the plants. This is actually an offset measurement, which we'll look at in a moment. For large, spreading plants you will need to record the spread too. It would be helpful if you were able to identify the plants that you're measuring. Don't worry, we'll look at that plant identification later too.

For all internal features on-site you will need to decide whether the triangulation method is the best to use, or whether you would get a better result using the offset technique. Both methods are fine and you will probably have to use both during the survey. So long as, whichever technique you are using, the measurements come from a fixed point.

Offset measurements

These are excellent for determining an irregular shape such as lawn edges, flowerbeds and ponds. You will need to introduce a new baseline that is in a more convenient position. Wherever your new baseline is, be it along a fence or down the middle of the garden, make sure you plot that baseline in relation with other fixed points. Using your steel retractable measuring tape, take measurements from your new baseline at right angles to the feature to be measured. Use aset square if necessary, to ensure excat 90* angles. Take measurements at regular intervals along the feature (see diagram below), allowing closer intervals for more curvier subjects. If you find your baseline is greater than, say, 3 metres from the feature you are trying to measure, it would be advisable to move your baseline closer to avoid inaccuracy.


Try to be as methodical as you can when you measure your garden. When you worked on your original baseline, I encouraged you to measure any features that were close by. If you are certain that you have all measurements required in the area of the first baseline, you can move it and use the tape for new baselines around the garden. Unless you want to use this process as a fitness workout and want to run about all over the place, then you'll find it easier, and faster, to measure an area of your garden just once.

Make sure that you record every feature, whether you plan on getting rid of it or not. If you have a summerhouse, that you intend on getting rid of, but later change your mind, you will already have its dimensions and position to hand. Remember to measure heights and thicknesses of retaining walls. With greenhouses and other buildings don't just measure to the apex of the roof but also to the lowest part of the roof. Remember to observe the way the doors open, their width, any other interesting details that you may find helpful later on. You will need to measure any steps in the garden, including the risers ands depth of each step. Any features, such as lighting or handrails will need to be recorded.

Are you exhausted yet? Don't worry you're nearly finished with this stage, then you can move onto more exciting parts of garden design.

If you have got steps in your garden, then that indicates that you must have a change in levels - don't lie to me now, I'll know! Guess what? You'll need to measure the level changes too. I'll go into that next time. Right now though, I'd say you deserve a nice cup of tea/coffee/other after all that hard work!